Loading... Please wait...
- Home
- Notes
- Tech Notes
- Dell Poweredge R430 Hard Drive Replacement Steps
Categories
Dell Poweredge R430 Hard Drive Replacement Steps
Dell Poweredge R430 Hard Drive Replacement Steps
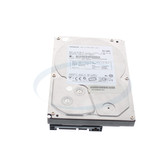
Here are the steps for replacing or upgrading the hard drives in a Dell PowerEdge R430 server:
-
Identify the drive to be replaced or upgraded and ensure you have a compatible replacement or upgrade drive.
-
If the drive is part of a RAID array, follow the RAID controller's documentation for the proper procedure to replace or upgrade the drive without losing data.
-
If the server supports hot-swappable drives, you can proceed with the replacement while the server is running. Otherwise, power down the server and disconnect the power cables before proceeding.
-
Press the release button on the drive carrier to unlock it and slide the drive out of the server.
-
Remove the drive from the carrier (if applicable) and install the new drive in the carrier.
-
Slide the drive carrier with the new drive back into the server until it locks into place.
-
If the drive is part of a RAID array, follow the RAID controller's documentation to rebuild the array and incorporate the new drive.
-
Monitor the server's iDRAC or OpenManage Server Administrator (OMSA) interface to ensure the new drive is recognized and functioning correctly.
- When upgrading or replacing hard drives in a Dell PowerEdge R430 server, always use genuine Dell parts to ensure compatibility and proper performance.